
How do I replace self-signed certificates?
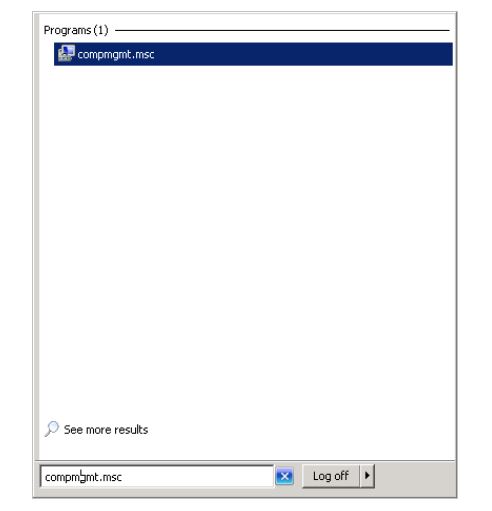
Step 1: Run
or right click on My Computer and choose Manage.
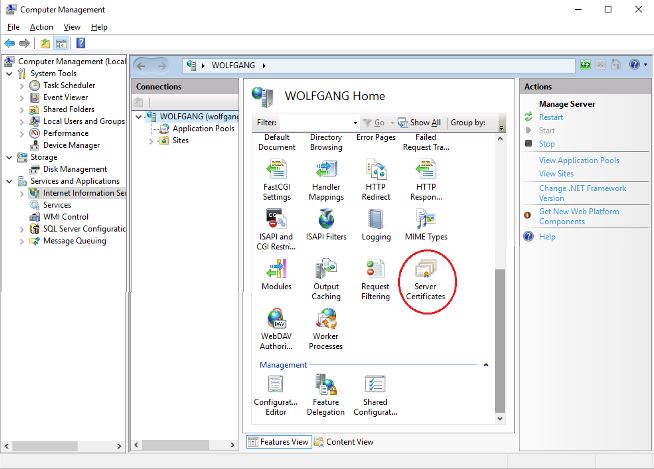
Step 2: Expand Services and Application.
Step 3: Click Internet Information Services.
Step 4: Double click Server Certificates.
Step 5: Make note of the name of the certificate.
Name should be the same as the computer machine name.
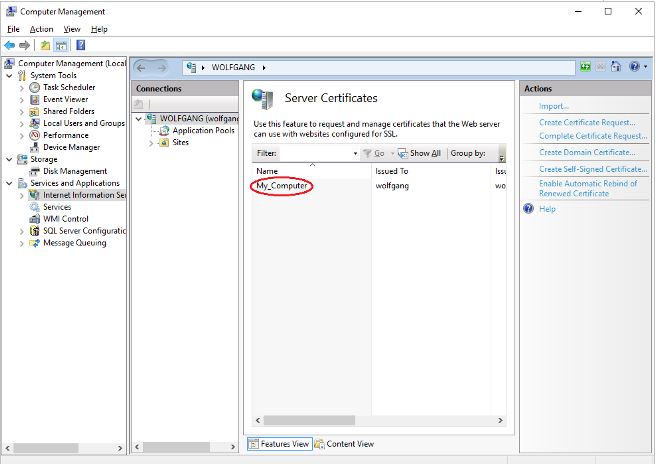
Step 6: Highlight Server Certificate.
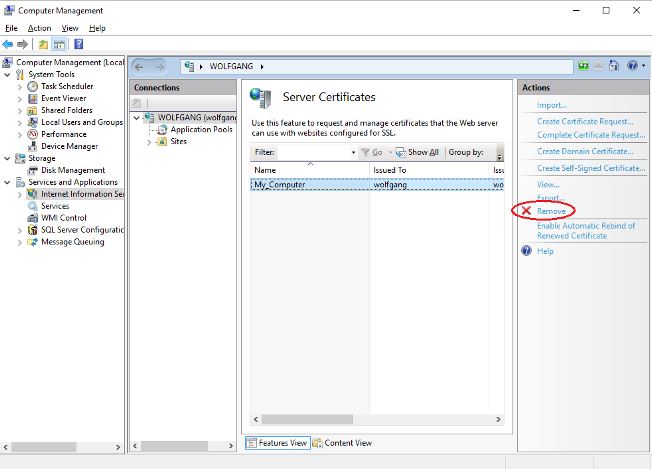
Step 7: Click Remove.
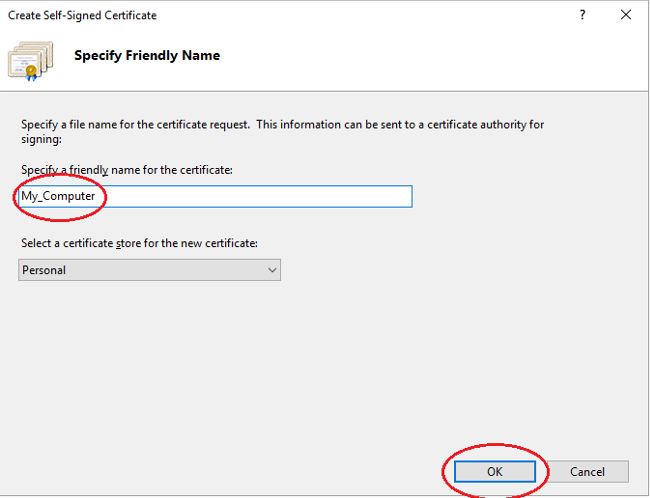
Step 8: Click Create Self-Signed Certificate.

Step 9: Add name of previous certificate.
Step 10: Click OK.
Step 11: Click on Services n the left hand side.
Step 12: Locate Vertex Service.
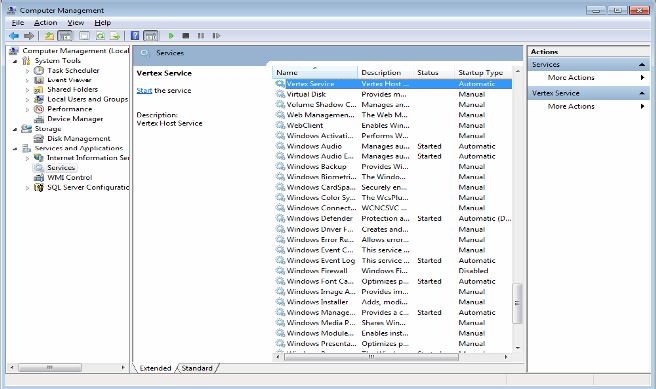
Step 13: Right click and choose Start.